This contains various commands and information that I find useful for AWS work.
Install latest version of AWS CLI on linux
curl "https://awscli.amazonaws.com/awscli-exe-linux-x86_64.zip" \
  -o "awscliv2.zip"
unzip awscliv2.zip
sudo ./aws/install
Resource: https://docs.aws.amazon.com/cli/latest/userguide/install-cliv2-linux.html
Check AWS CLI is installed
if ! [ -x "$(command -v aws)" ]; then
  echo 'Error: AWS CLI is not installed.' >&2
else
  echo 'AWS CLI is installed.'
  aws --version
fi
Credentials
Use env vars
Create the following env vars with your AWS credentials:
export AWS_ACCESS_KEY_ID=AKIAI44QH8DHBEXAMPLE
export AWS_SECRET_ACCESS_KEY=wJalrXUtnFEMI/K7MDENG/bPxRfiCYEXAMPLEKEY
Set up named profiles
You can run aws configure for guided setup. Alternatively, you can add the
following to ~/.aws/credentials:
[myenv]
export AWS_ACCESS_KEY_ID=AKIAI44QH8DHBEXAMPLE
export AWS_SECRET_ACCESS_KEY=wJalrXUtnFEMI/K7MDENG/bPxRfiCYEXAMPLEKEY
If you don’t opt for the guided setup, don’t forget to set the region in
~/.aws/config:
[profile myenv]
region = us-west-2
output = json
Resource: Set up config file with named profile
Populate env vars using credentials file
export AWS_ACCESS_KEY_ID=$(aws configure get aws_access_key_id)
export AWS_SECRET_ACCESS_KEY=$(aws configure get aws_secret_access_key)
Resource: https://github.com/kubernetes/kops/blob/master/docs/getting_started/aws.md#setup-iam-user
Populate config file with env vars
PROFILE_NAME=superneatawsenv
aws configure set region "${AWS_DEFAULT_REGION}" \
  --profile "${PROFILE_NAME}"
Multiple profiles
If you have multiple profiles set in ~/.aws/credentials like so:
[default]
aws_access_key_id = AKIAI44QH8DHBEXAMPLE
aws_secret_access_key = wJalrXUtnFEMI/K7MDENG/bPxRfiCYEXAMPLEKEY

[notdefault]
aws_access_key_id = AKIAI44QH8DHBEXAMPLE2
aws_secret_access_key = wJalrXUtnFEMI/K7MDENG/bPxRfiCYEXAMPLEKEY2
and want to use the notdefault profile, run the following command:
export AWS_PROFILE=notdefault
This will save you from having to export any other environment variables, which is incredibly useful when you have to switch environments often.
Use temp credentials
Add the temporary credentials to
~/.aws/credentials:[temp] aws_access_key_id = AKIAI44QH8DHBEXAMPLE aws_secret_access_key = wJalrXUtnFEMI/K7MDENG/bPxRfiCYEXAMPLEKEY aws_session_token = AQoDYXdzEJr...Run this command:
export AWS_PROFILE=temp
Resource: https://docs.aws.amazon.com/sdk-for-go/v1/developer-guide/configuring-sdk.html
Alternatively, you can set env vars with the credentials as well:
export AWS_ACCESS_KEY_ID=AKIAI44QH8DHBEXAMPLE
export AWS_SECRET_ACCESS_KEY=wJalrXUtnFEMI/K7MDENG/bPxRfiCYEXAMPLEKEY
export AWS_SESSION_TOKEN=AQoDYXdzEJr...
Resource: https://docs.aws.amazon.com/IAM/latest/UserGuide/id_credentials_temp_use-resources.html
Show configuration
aws configure list
EC2
Copy AMI to another region
This particular example will copy ami-xxxxxxxxxx from us-west-2 to us-east-1:
aws ec2 copy-image --source-region us-west-2 \
  --source-image-id ami-xxxxxxxxxx --region us-east-1 --name "My server in east"
Authorize inbound traffic for a security group
# Authorize Security Group Ingress
# Authorizes inbound traffic for the specified security group if the rule
# doesn't already exist.
# Creates the security group if it doesn't already exist.
#
# Usage:
#   authorize_security_group_ingress [group_name] [group_description] [vpc_id]
#   [protocol] [port] [cidr]
#
# Output:
#   Returns the id of the security group, but configures the security group to
#   allow inbound traffic if the rule is added.
#   If the security group or rule already exists, outputs a message indicating
#   the existing group or rule.
#
# Example(s):
#   SECURITY_GROUP_ID=$(authorize_security_group_ingress "my_security_group"
#   "Description of my security group" "vpc-0abcd1234efgh5678" "tcp" "22" "0.0.0.0/0")
function authorize_security_group_ingress() {
    local group_name=$1
    local group_description=$2
    local vpc_id=$3
    local protocol=$4
    local port=$5
    local cidr=$6

    # Check if the security group already exists
    local security_group_id
    security_group_id=$(aws ec2 describe-security-groups --filters Name=group-name,Values="$group_name" --query 'SecurityGroups[0].GroupId' --output text)

    # If the security group doesn't exist or command fails, create it
    if [ -z "$security_group_id" ] || [ "$security_group_id" == "None" ]; then
        if ! security_group_id=$(aws ec2 create-security-group --group-name "$group_name" --description "$group_description" --vpc-id "$vpc_id" --query 'GroupId' --output text); then
            echo "Failed to create security group: $group_name"
            return 1
        fi
        echo "Created security group $group_name with ID: $security_group_id"
    else
        echo "Security group $group_name already exists with ID: $security_group_id"
    fi

    # Check if the ingress rule already exists
    local existing_rule
    existing_rule=$(aws ec2 describe-security-groups \
        --group-ids "$security_group_id" \
        --query "SecurityGroups[0].IpPermissions[?IpProtocol=='$protocol' && FromPort=='$port' && contains(IpRanges[].CidrIp, '$cidr')]")

    if [ -n "$existing_rule" ]; then
        echo "Ingress rule already exists for: $protocol port $port from $cidr"
        echo "$security_group_id"
    else
        if aws ec2 authorize-security-group-ingress \
            --group-id "$security_group_id" \
            --protocol "$protocol" \
            --port "$port" \
            --cidr "$cidr"; then
            echo "Added ingress rule to security group $group_name"
            echo "$security_group_id"
        else
            echo "Failed to add ingress rule to security group $group_name"
            return 1
        fi
    fi
}
Find the Default Subnet
# Find Default Subnet
# Finds the default subnet ID.
#
# Usage:
#   find_default_subnet
#
# Output:
#   Outputs the default subnet ID.
#
# Example(s):
#   find_default_subnet
function find_default_subnet()
                               {
    aws ec2 describe-subnets \
        --filters "Name=default-for-az,Values=true" \
        --output text --query 'Subnets[0].SubnetId'
}
Backup instance via UI
- Go to your instance
- Right click and select Image from the dropdown
- Click Create Image
- Give your backup a name and description
- Click No reboot if you want your instance to stay in a running state
- Click Create Image
- At this point you should be able to find the AMI that is associated with your backup under AMIs. Give the AMI a more descriptive name if you’d like.
Resource: https://n2ws.com/blog/how-to-guides/automate-amazon-ec2-instance-backup
Backup instance via CLI
INST_ID=INSTANCE_ID_GOES_HERE
aws ec2 create-image \
  --instance-id ${INST_ID} \
  --name "backup_of_${INST_ID}" \
  --description "an AMI"
You can also add the --no-reboot parameter to stop the instance from being
restarted.
Resources:
List instances
aws ec2 describe-instances
Disable Pagination
Adding --no-cli-pager ensures aws cli results are not paginated.
aws ec2 describe-instances --query 'Reservations[].Instances[].[InstanceId, State.Name, InstanceName]' --no-cli-pager
Get number of instances
aws ec2 describe-instances \
  --query 'Reservations[*].Instances[*].[InstanceId]' \
  --output text \
  | wc -l
Resource: https://stackoverflow.com/questions/40164786/determine-how-many-aws-instances-are-in-a-zone
Get running instances
aws ec2 describe-instances \
  --filters Name=instance-state-name,Values=running
Get Name and public IP of running instances
<!-- markdownlint-disable MD013 -->
aws ec2 describe-instances \
  --query \
  "Reservations[*].Instances[*].{PublicIP:PublicIpAddress,Name:Tags[?Key=='Name']|[0].Value,Status:State.Name}" \
  --filters Name=instance-state-name,Values=running
Resource: https://www.middlewareinventory.com/blog/aws-cli-ec2/
Reboot all instances in a region
aws ec2 reboot-instances --instance-ids \
  $(aws ec2 describe-instances --query "Reservations[*].Instances[*].InstanceId" \
  | jq '.[]|.[0]' -r)
Assign an elastic IP to an instance
EIP_ID=ELASTIC_IP_ID_GOES_HERE
INST_ID=INSTANCE_ID_GOES_HERE
aws ec2 associate-address \
  --allocation-id "eipalloc-${EIP_ID}" \
  --instance-id "${INST_ID}
Create instance with a tag
aws ec2 run-instances \
  --image-id ami-xxxxxxx \
  --count 1 \
  --instance-type t2.medium \
  --key-name MyKeyPair \
  --security-group-ids sg-xxxxxx \
  --subnet-id subnet-xxxxxx \
  --tag-specifications \
    'ResourceType=instance,Tags=[{Key=Name,Value=my-test-instance}]'
Create instance using security group name
aws ec2 run-instances --image-id ami-xxxxxxxx --count 1 --instance-type t1.micro --key-name MyKeyPair --security-groups MySecurityGroup
Get Active Regions
ACTIVE_REGIONS=()

get_active_regions() {
  ACTIVE_REGIONS=($(aws ec2 describe-regions --all-regions | jq -r '.Regions | .[] | .RegionName + " " + .OptInStatus'  | grep -v not-opted-in | cut -d' ' -f1))
}

get_active_regions

for region in ${ACTIVE_REGIONS[@]}; do
  echo ${region}
done
Resource: https://dev.to/vumdao/list-all-enabled-regions-within-an-aws-account-4oo7
Create security group
aws ec2 create-security-group --group-name MySecurityGroup --description "My security group" --vpc-id $VPC
Resource: https://docs.aws.amazon.com/cli/latest/reference/ec2/create-security-group.html
Get security group id from group name
sg_name=sg-bla
aws ec2 describe-security-groups \
  --filters Name=group-name,Values=$sg_name --query "SecurityGroups[*].[GroupId]" \
  --output text
Resource: https://docs.aws.amazon.com/cli/latest/reference/ec2/describe-security-groups.html
Delete security group
# Delete Security Group
# Deletes a specified security group.
#
# Usage:
#   delete_security_group
#
# Output:
#   Deletes the specified security group if it exists. If it doesn't exist,
#   the function outputs a message indicating so.
#   If the function fails to delete the security group, it retries every
#   5 seconds until successful.
#
# Example(s):
#   delete_security_group
delete_security_group()
                        {
    SEC_GRP=pt-ssm-security-group
    # Attempt to get the ID of the security group and capture any error message
    if SEC_GRP_ID=$(aws ec2 describe-security-groups --group-names "$SEC_GRP" --query 'SecurityGroups[0].GroupId' --output text 2> /dev/null); then
        while true; do
            # Try to delete the security group
            if aws ec2 delete-security-group --group-id="$SEC_GRP_ID" > /dev/null 2>&1; then
                # If successful, exit the loop
                echo "Successfully deleted security group: $SEC_GRP"
                break
            else
                # If unsuccessful, sleep for 5 seconds and try again
                echo "Failed to delete security group: $SEC_GRP. Retrying in 5 seconds..."
                sleep 5
            fi
        done
    else
        echo "Security group $SEC_GRP does not exist, nothing to delete."
    fi
}
Get ingress TCP ports from a group
ports=($(aws ec2 describe-security-groups --group-ids ${sg} --query 'SecurityGroups[*].IpPermissions[]' | jq '.[] | select(.IpProtocol=="tcp").ToPort'))

for port in ${ports[@]}; do
    echo "port"
done
Resources:
Add ingress rule to security group
aws ec2 authorize-security-group-ingress \
    --group-id $sg_id \
    --protocol tcp \
    --port 22 \
    --cidr "$(curl ifconfig.me)/32"
Resource: https://fossies.org/linux/aws-cli/awscli/examples/ec2/authorize-security-group-ingress.rst
List instances with filtering
This particular example will return all of the m1.micro instances that you have.
aws ec2 describe-instances --filters "Name=instance-type,Values=m1.micro"
List instance by instance id
aws ec2 describe-instances --instance-ids $INSTANCE_ID
Destroy instances
# Single instance
aws ec2 terminate-instances \
  --instance-ids "${INSTANCE_ID1}"
INSTANCE_IDS=( $INSTANCE_ID1 $INSTANCE_ID2 )

# Multiple instances
for i in "${INSTANCE_IDS[@]}"; do
  aws ec2 terminate-instances --instance-ids "${i}"
done
Resource: https://stackoverflow.com/questions/10541363/self-terminating-aws-ec2-instance
Function for terminating instances
# Terminate Instance
# Terminates a specified EC2 instance.
#
# Usage:
#   terminate_instance [instance_id]
#
# Output:
#   Terminates the instance if it's running. If it's already being terminated, the function skips it.
#   If the instance is in an unexpected state, it throws an error.
#
# Example(s):
#   terminate_instance "i-0abcd1234efgh5678"
terminate_instance()
                     {
    local instance_id=$1
    while true; do
        instance_status=$(aws ec2 describe-instances --instance-ids "$instance_id" \
            --query 'Reservations[0].Instances[0].State.Name' --output text --no-cli-pager)
        if [ "$instance_status" == "terminated" ] || [ "$instance_status" == "shutting-down" ]; then
            echo "Skipping instance $instance_id which is already $instance_status"
            break
        elif [ "$instance_status" == "running" ]; then
            echo "Terminating instance: $instance_id"
            aws ec2 terminate-instances --instance-ids "$instance_id" --no-cli-pager
            break
        else
            echo "Unexpected instance status: $instance_status"
            exit 1
        fi
    done
}
AMI info to JSON
aws ec2 describe-images \
  --filters "Name=name,Values=<AMI Name>" \
  --output json
Get AMI id from AMI name
AMI_ID=$(aws ec2 describe-images \
  --filters "Name=name,Values=THEAMINAME" \
  --query 'sort_by(Images, &CreationDate)[-1].[ImageId]' --output text)

echo $AMI_ID
Resource: https://stackoverflow.com/questions/40835953/how-to-find-ami-id-of-centos-7-image-in-aws-marketplace
Find latest ubuntu 22.04 AMI
aws ec2 describe-images --output json --region "${AWS_DEFAULT_REGION}" \
      --filters "Name=name,Values=ubuntu/images/hvm-ssd/ubuntu-jammy-22.04-amd64-server*" \
      --query 'sort_by(Images, &CreationDate)[-1].{Name: Name, ImageId: ImageId, CreationDate: CreationDate, Owner:OwnerId}' \
      --output text | awk '{print $2}'
Deregister an AMI
aws ec2 deregister-image --image-id "${AMI_ID}"
Wait for instance to finish initializing
INSTANCE_ID=i-....
instance_status="initializing"
while [[ "$instance_status" == "initializing" || "$instance_status" == "null" ]]; do
    instance_status=$(aws ec2 describe-instance-status --instance-id ${INSTANCE_ID} \
        | jq -r ".InstanceStatuses[0].InstanceStatus.Status")
    sleep 10
done
One-liner
status=initializing; while [[ $status != "ok" || "$instance_status" == "null" ]]; do status=$(aws ec2 describe-instance-status --instance-id $INSTANCE_ID | jq -r ".InstanceStatuses[0].InstanceStatus.Status"); echo 'initializing!'; sleep 5; done
Get list of all instances with the state terminated
aws ec2 describe-instances --filters "Name=instance-state-name,Values=terminated"
List all instances that match a tag name and are running
aws ec2 describe-instances \
  --filters "Name=tag:Name,Values=*somename*" "Name=instance-state-name,Values=running" \
    | jq
Resources:
Alternatively, if you want running instances, change Values=terminated to Values=running.
Get info about an AMI by product-code
aws ec2 describe-images \
  --owners aws-marketplace \
  --filters Name=product-code,Values=$PRODUCT_CODE
This is useful if you have the product code and want more information (like the image ID). For CentOS, you can get the product code [here](https://wiki.centos.org/Cloud/AWS.
I started down this path when I was messing around with the code in this gist for automatically creating encrypted AMI’s.
Show available subnets
aws ec2 describe-subnets
Attach volume at root
aws ec2 attach-volume \
  --volume-id vol-xxxx \
  --instance-id i-xxxx \
  --device /dev/sda1
List snapshots
aws ec2 describe-snapshots \
  --output json \
  --query 'Snapshots[*].SnapshotId' \
  --max-items 10 \
    | head
Use Multiple Filters
You need to separate with spaces and put each in quotes. This particular example will find tcp and udp security groups open to 0.0.0.0/0:
aws ec2 describe-security-groups \
  --filters "Name=ip-permission.cidr,Values='0.0.0.0/0'" "Name=ip-permission.protocol,Values='tcp'" "Name=ip-permission.protocol,Values='udp'" \
  --query "SecurityGroups[*].[GroupId]" \
    | jq -r .[][0]
Resource: https://github.com/aws/aws-cli/issues/582
Attach security group to instance
aws ec2 modify-instance-attribute --instance-id i-12345 --groups sg-12345 sg-67890
Get owner of an AMI
# List of your AMI IDs
DEBIAN=ami-072d0c3766d522751
KALI=ami-0984d6243e1df22b0

ami_ids=("$DEBIAN" "$KALI")

# Loop over each AMI ID
for ami_id in "${ami_ids[@]}"
do
    echo "Getting owner for AMI: ${ami_id}"

    # Describe the AMI and get the OwnerId
    owner_id=$(aws ec2 describe-images --image-ids $ami_id | jq -r '.Images[0].OwnerId')

    echo "Owner ID: ${owner_id}"
done
Resize EC2 Partition
This example was done on a debian system.
Increase the size of the EBS volume.
Run this command to display NVMe block devices on the instance:
lsblk
NAME     MAJ:MIN RM  SIZE RO TYPE MOUNTPOINTS
xvda     202:0    0   50G  0 disk
├─xvda1  202:1    0 11.9G  0 part /
├─xvda14 202:14   0    3M  0 part
└─xvda15 202:15   0  124M  0 part /boot/efi
Resize the partition:
sudo growpart /dev/xvda 1Confirm the partition size matches the EBS volume size:
lsblk
NAME     MAJ:MIN RM  SIZE RO TYPE MOUNTPOINTS
xvda     202:0    0   50G  0 disk
├─xvda1  202:1    0 49.9G  0 part /
├─xvda14 202:14   0    3M  0 part
└─xvda15 202:15   0  124M  0 part /boot/efi
Observe that the filesystem still needs to be extended:
df -h /
Filesystem      Size  Used Avail Use% Mounted on
/dev/xvda1       12G   11G   91M 100% /
Extend the filesystem:
sudo resize2fs /dev/xvda1Confirm the file system shows the updated volume size:
df -h /
Filesystem      Size  Used Avail Use% Mounted on
/dev/xvda1       50G   11G   36G  24% /
Resource: https://docs.aws.amazon.com/AWSEC2/latest/UserGuide/recognize-expanded-volume-linux.html
Get latest AMI ID
# Get Latest AMI
# Fetches the ID of the latest Amazon Machine Image (AMI) for the
# specified OS distribution, version, and architecture.
#
# Usage:
#   get_latest_ami [distro] [version] [architecture]
#
# Output:
#   Outputs the ID of the AMI.
#
# Example(s):
#   get_latest_ami "ubuntu" "20.04" "amd64"
function get_latest_ami() {
    local distro=$1
    local version=$2
    local architecture=$3

    if [[ "$distro" == "ubuntu" ]]; then
        if [[ "$version" == "22.04" ]]; then
            if [[ "$architecture" == "amd64" ]]; then
                amiNamePattern="ubuntu/images/hvm-ssd/ubuntu-jammy-%s-amd64-server-*"
            elif [[ "$architecture" == "arm64" ]]; then
                amiNamePattern="ubuntu/images/hvm-ssd/ubuntu-jammy-%s-arm64-server-*"
            else
                echo "Unsupported architecture: $architecture"
                return 1
            fi
        elif [[ "$version" == "20.04" ]]; then
            if [[ "$architecture" == "amd64" ]]; then
                amiNamePattern="ubuntu/images/hvm-ssd/ubuntu-focal-%s-amd64-server-*"
            elif [[ "$architecture" == "arm64" ]]; then
                amiNamePattern="ubuntu/images/hvm-ssd/ubuntu-focal-%s-arm64-server-*"
            else
                echo "Unsupported architecture: $architecture"
                return 1
            fi
        elif [[ "$version" == "18.04" ]]; then
            if [[ "$architecture" == "amd64" ]]; then
                amiNamePattern="ubuntu/images/hvm-ssd/ubuntu-bionic-%s-amd64-server-*"
            elif [[ "$architecture" == "arm64" ]]; then
                amiNamePattern="ubuntu/images/hvm-ssd/ubuntu-bionic-%s-arm64-server-*"
            else
                echo "Unsupported architecture: $architecture"
                return 1
            fi
        else
            echo "Unsupported version: $version"
            return 1
        fi
        owner="099720109477"  # Canonical
    elif [[ "$distro" == "centos" ]]; then
        if [[ "$version" == "7" ]]; then
            if [[ "$architecture" == "x86_64" ]]; then
                amiNamePattern="CentOS Linux %s x86_64 HVM EBS*"
            elif [[ "$architecture" == "arm64" ]]; then
                amiNamePattern="CentOS Linux %s arm64 HVM EBS*"
            else
                echo "Unsupported architecture: $architecture"
                return 1
            fi
        elif [[ "$version" == "8" ]]; then
            if [[ "$architecture" == "x86_64" ]]; then
                amiNamePattern="CentOS %s AMI*"
            elif [[ "$architecture" == "arm64" ]]; then
                amiNamePattern="CentOS %s ARM64 AMI*"
            else
                echo "Unsupported architecture: $architecture"
                return 1
            fi
        else
            echo "Unsupported version: $version"
            return 1
        fi
        owner="679593333241"  # Kali Linux
    elif [[ "$distro" == "debian" ]]; then
        if [[ "$version" == "10" ]]; then
            if [[ "$architecture" == "amd64" ]]; then
                amiNamePattern="debian-%s-buster-hvm-amd64-gp2*"
            elif [[ "$architecture" == "arm64" ]]; then
                amiNamePattern="debian-%s-buster-hvm-arm64-gp2*"
            else
                echo "Unsupported architecture: $architecture"
                return 1
            fi
        else
            echo "Unsupported version: $version"
            return 1
        fi
        owner="136693071363"  # Debian
    elif [[ "$distro" == "kali" ]]; then
        if [[ "$version" == "2023.1" ]]; then
            if [[ "$architecture" == "amd64" ]]; then
                amiNamePattern="kali-linux-%s-amd64*"
            elif [[ "$architecture" == "arm64" ]]; then
                amiNamePattern="kali-linux-%s-arm64*"
            else
                echo "Unsupported architecture: $architecture"
                return 1
            fi
        else
            echo "Unsupported version: $version"
            return 1
        fi
        owner="679593333241"  # Kali Linux
    else
        echo "Unsupported distribution: $distro"
        return 1
    fi

    # shellcheck disable=SC2059
    amiNamePattern=$(printf "$amiNamePattern" "$version")

    wait

    # Extract the AMI ID using string manipulation
    AMI_ID=$(aws ec2 describe-images \
        --filters "Name=name,Values=$amiNamePattern" \
        --owners "$owner" \
        --query 'sort_by(Images, &CreationDate)[-1].ImageId' \
        --output text)
    if [ -z "$AMI_ID" ]; then
        echo "No images found for distro: $distro, version: $version, architecture: $architecture"
        return 1
    fi

    echo "$AMI_ID"
}

# Usage example
AMI_ID=$(get_latest_ami "ubuntu" "22.04" "amd64" "${AWS_DEFAULT_REGION}")
echo "Latest AMI ID: $AMI_ID"
Get default VPC_ID
VPC_ID=$(aws ec2 describe-vpcs --filters "Name=isDefault,Values=true" \
  --query 'Vpcs[0].VpcId' --output text --profile $AWS_PROFILE --region $AWS_DEFAULT_REGION)
Get default subnet ID
DEFAULT_SUBNET_ID=$(aws ec2 describe-subnets --filters "Name=default-for-az,Values=true" \
  --query 'Subnets[0].SubnetId' --output text --profile $AWS_PROFILE --region $AWS_DEFAULT_REGION)
CodeCommit
CodeCommit is a service in AWS that provides an option for private git repos. Access can be dictated by IAM, which is nice.
CodeBuild
Golden Image Tutorial
CodeBuild + CodeCommit to bake golden images
Create CodeBuild IAM role
- Login to the UI
- Click on IAM
- Click Roles
- Click Create role
- Click EC2, then click Next: Permissions
- Search for CodeCommit, check the box next to AWSCodeCommitReadOnly
- Click Next: Tags
- Give it some tags if you’d like, click Next: Review
- Specify a Role name, like CodeCommit-Read
- Click Create role
- Create an instance and assign it the role we just created as an instance profile.
Cloning into a repo
Once you’ve got a working instance:
SSH into it
Escalate privileges:
sudo suInstall the awscli with pip:
pip install awscliRun these commands and be sure to change the region to match the one you’re using:
git config --system credential.https://git-codecommit.us-west-2.amazonaws.com.helper '!aws codecommit credential-helper $@'
git config --system credential.https://git-codecommit.us-west-2.amazonaws.com.UseHttpPath true

git config --system \
credential.https://git-codecommit.us-west-2.amazonaws.com.helper \
'!aws codecommit credential-helper $@'

git config --system \
credential.https://git-codecommit.us-west-2.amazonaws.com.UseHttpPath true
Run this command and be sure to change the region to match the one you’re working with:
aws configure set region us-west-2Clone your repo:
git clone https://git-codecommit.us-west-2.amazonaws.com/v1/repos/GREATREPONAME
Resources:
- https://jameswing.net/aws/codecommit-with-ec2-role-credentials.html
- https://stackoverflow.com/questions/46164223/aws-pull-latest-code-from-codecommit-on-ec2-instance-startup
- git config commands to authenticate
Using this role with CodeBuild
To get this to work with CodeBuild for automated and repeatable builds, I needed
to do a few other things. Primarily, take advantage of the Parameter Store. When
I was trying to build initially, my buildspec.yml looked something like this
(basically emulating the one found in
the AWS AMI Builder with CodeBuild and Packer guide):
---
version: 0.2

phases:
  pre_build:
    commands:
      - echo "Installing HashiCorp Packer..."
      - curl -qL -o packer.zip
        https://releases.hashicorp.com/packer/1.1.1/packer_1.1.1_linux_amd64.zip
        && unzip packer.zip
      - echo "Installing jq..."
      - curl -qL -o jq https://stedolan.github.io/jq/download/linux64/jq &&
        chmod +x ./jq
      - echo "Validating kali.json"
      - ./packer validate kali.json
  build:
    commands:
      ## HashiCorp Packer cannot currently obtain the AWS CodeBuild-assigned role and its credentials
      ## Manually capture and configure the AWS CLI to provide HashiCorp Packer with AWS credentials
      ## More info here: https://github.com/mitchellh/packer/issues/4279
      - echo "Configuring AWS credentials"
      - curl -qL -o aws_credentials.json
        http://169.254.170.2/$AWS_CONTAINER_CREDENTIALS_RELATIVE_URI >
        aws_credentials.json
      - aws configure set region $AWS_REGION
      - aws configure set aws_access_key_id `./jq -r '.AccessKeyId'
        aws_credentials.json`
      - aws configure set aws_secret_access_key `./jq -r '.SecretAccessKey'
        aws_credentials.json`
      - aws configure set aws_session_token `./jq -r '.Token'
        aws_credentials.json`
      - echo "Building HashiCorp Packer template, kali.json"
      - ./packer build kali.json
  post_build:
    commands:
      - echo "HashiCorp Packer build completed on `date`"
However, I was getting this obscure error message about authentication, and
spent several hours messing around with IAM roles, but didn’t have any luck. At
some point, I eventually decided to try throwing a “parameter” in for the
AWS_ACCESS_KEY_ID and AWS_SECRET_ACCESS_KEY. This worked great, but I
noticed that whenever I tried the build again, I would run into the same issue
as before. To fix it, I had to modify the buildspec.yml to look like this
(obviously the values you have for your parameter store may vary depending on
what you set for them):
---
version: 0.2

env:
  parameter-store:
    AWS_ACCESS_KEY_ID: "/CodeBuild/AWS_ACCESS_KEY_ID"
    AWS_SECRET_ACCESS_KEY: "/CodeBuild/AWS_SECRET_ACCESS_KEY"

phases:
  pre_build:
    commands:
      - echo "Installing HashiCorp Packer..."
      - curl -qL -o packer.zip
        https://releases.hashicorp.com/packer/1.1.1/packer_1.1.1_linux_amd64.zip
        && unzip packer.zip
      - echo "Installing jq..."
      - curl -qL -o jq https://stedolan.github.io/jq/download/linux64/jq &&
        chmod +x ./jq
      - echo "Validating kali.json"
      - ./packer validate kali.json
  build:
    commands:
      ## HashiCorp Packer cannot currently obtain the AWS CodeBuild-assigned role and its credentials
      ## Manually capture and configure the AWS CLI to provide HashiCorp Packer with AWS credentials
      ## More info here: https://github.com/mitchellh/packer/issues/4279
      - echo "Configuring AWS credentials"
      - curl -qL -o aws_credentials.json
        http://169.254.170.2/$AWS_CONTAINER_CREDENTIALS_RELATIVE_URI >
        aws_credentials.json
      - aws configure set region $AWS_REGION
      - aws configure set aws_access_key_id `./jq -r '.AccessKeyId'
        aws_credentials.json`
      - aws configure set aws_secret_access_key `./jq -r '.SecretAccessKey'
        aws_credentials.json`
      - aws configure set aws_session_token `./jq -r '.Token'
        aws_credentials.json`
      - echo "Building HashiCorp Packer template, kali.json"
      - ./packer build kali.json
  post_build:
    commands:
      - echo "HashiCorp Packer build completed on `date`"
At this point, everything is working consistently with the IAM role mentioned previously being specified in the packer file (this is a snippet):
"variables": {
    "iam_role": "CodeCommit-Read"
  },

  "builders": [{
    "iam_instance_profile": "{{user `iam_role` }}",
  }],
Validate buildspec
python3 -c 'import yaml, sys; yaml.safe_load(sys.stdin)' < buildspec.yml
Resource: https://howchoo.com/python/how-to-validate-yaml-from-the-command-line
Debug Codebuild
You can get a shell to your codebuild system, which is incredibly helpful when it comes to debugging build problems.
- Add the
AmazonSSMFullAccesspolicy to your codebuild service role - Add a breakpoint to
buildspec.yml: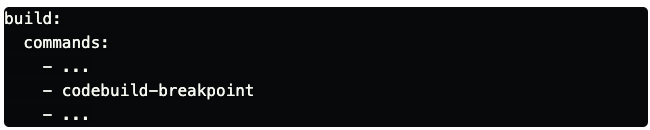
- Click Start build with overrides -> Advanced build overrides
- Under environment, click the checkbox next to Enable session connection
- Click Start build
- Click the AWS Session Manager link that appears under build status to access the system
Once you’re done debugging, type in codebuild-resume
Resource: https://dev.to/glnds/how-to-debug-and-trace-problems-in-aws-codebuild-1cgl
S3
Create bucket
BUCKET_NAME=my-bucket-is-neat
# if you need a random name:
BUCKET_NAME=$(head /dev/urandom | tr -dc a-z0-9 | head -c 25 ; echo '')
aws s3 mb s3://$BUCKET_NAME
Resource: https://linuxacademy.com/blog/amazon-web-services-2/aws-s3-cheat-sheet/
List buckets
aws s3 ls
List all buckets in a region
#!/bin/bash

REGION="us-west-1"
OUTPUT_FILE="buckets.txt"

buckets=$(aws s3api list-buckets --query "Buckets[].Name" --output json | jq -r '.[]')

# Clear the output file
echo "" > $OUTPUT_FILE

for bucket in $buckets
do
    bucket_region=$(aws s3api get-bucket-location --bucket $bucket --output json | jq -r '.LocationConstraint')
    if [ "$bucket_region" == "$REGION" ] || ( [ "$REGION" == "us-east-1" ] && [ "$bucket_region" == "null" ] ); then
        echo $bucket | tee -a $OUTPUT_FILE
    fi
done
List files in a bucket
aws s3 ls s3://target/
Download bucket
aws s3 sync s3://mybucket .
Resource: https://stackoverflow.com/questions/8659382/downloading-an-entire-s3-bucket/55061863
Copy file from bucket
aws s3 cp s3://target/file.html file.html
Copy file to bucket
aws s3 cp TEST s3://target
Resource: https://phpfog.com/copy-all-files-in-s3-bucket-to-local-with-aws-cli/
Copy folder to bucket
aws s3 cp foldertocopy s3://bucket/foldertocopy --recursive
Resource: https://coderwall.com/p/rckamw/copy-all-files-in-a-folder-from-google-drive-to-aws-s3
Copy folder from bucket
aws s3 cp s3://bucket/foldertocopy --recursive
Copy all files from a bucket
aws s3 cp s3://bucket/foldertocopy ./ --recursive
Read buckets into an array
buckets=($(aws s3 ls |grep tf | awk '{print $3}' | tr " " "\n"))
# Print first element
echo ${buckets[1]}
Iterate over buckets
for b in "${buckets[@]}"; do echo "Bucket: $b"; done
Empty bucket
Recursively delete all objects with versioning disabled
aws s3 rm s3://$BUCKET_NAME --recursive
Resource: https://towardsthecloud.com/aws-cli-empty-s3-bucket
Recursively delete all objects with versioning enabled
Delete objects in the bucket:
bucket=bucketname
aws s3api delete-objects --bucket "${bucket}" --delete \
  "$(aws s3api list-object-versions --bucket "${bucket}" \
    --query='{Objects: Versions[].{Key:Key,VersionId:VersionId}}')"
Delete markers in the bucket:
bucket=bucketname
aws s3api delete-objects --bucket ${bucket} --delete \
  "$(aws s3api list-object-versions --bucket ${bucket} \
   --query='{Objects: DeleteMarkers[].{Key:Key,VersionId:VersionId}}')"
Delete bucket
aws s3 rb s3://bucketname --force
Resource: https://docs.aws.amazon.com/AmazonS3/latest/userguide/delete-bucket.html
Script to clear and delete bucket
#!/bin/bash
set -ex

bucket_selection_criteria=bla
# List all buckets with the $bucket_selection_criteria
buckets=($(aws s3 ls | grep -i $bucket_selection_criteria | awk '{print $3}'))

for bucket in "${buckets[@]}"
do
    echo "Deleting objects from bucket: ${bucket}"

    # Remove all objects from the bucket
    aws s3 rm s3://$bucket --recursive

    echo "Deleting bucket: ${bucket}"

    # Delete the bucket
    aws s3 rb s3://$bucket
done
Copy multiple folders to bucket
aws s3 cp /path/to/dir/with/folders/to/copy \
  s3://bucket/ --recursive --exclude ".git/*"
Resource: https://superuser.com/questions/1497268/selectively-uploading-multiple-folders-to-aws-s3-using-cli
Set up S3 IAM for backup/restore
This is a much safer and preferable way to access an S3 bucket from an EC2 instance.
Create Policy
Create a new IAM policy
Copy this JSON and modify as needed for your bucket:
{
  "Version": "2012-10-17",
  "Statement": [
    {
      "Effect": "Allow",
      "Action": ["s3:ListBucket"],
      "Resource": ["arn:aws:s3:::techvomit"]
    },
    {
      "Effect": "Allow",
      "Action": ["s3:PutObject", "s3:GetObject"],
      "Resource": ["arn:aws:s3:::<bucket name>/*"]
    }
  ]
}
Create a Role
- Go to Roles in IAM
- Click Create role
- Select EC2
- Select EC2 again and click Next: Permissions
- Find the policy you created previously
- Click Next: Review
- Give the Role a name and a description, click Create role
Assign the role to your instance
This will be the instance that houses the service that requires a backup and restore service (your S3 bucket).
- In EC2, if the instance is already created, right click it, Instance Settings, Attach/Replace IAM Role
- Specify the IAM role you created previously, click Apply.
Set up automated expiration of objects
This will ensure that backups don’t stick around longer than they need to. You can also set up rules to transfer them to long term storage during this process, but we’re not going to cover that here.
From the bucket overview screen:
- Click Management
- Click Add lifecycle rule
- Specify a name, click Next
- Click Next
- Check Current version and Previous versions
- Specify a desired number of days to expiration for both the current version and the previous versions, click Next
- Click Save
Create IAM role to grant read access to an s3 bucket
If accessing from an ec2 instance, find your ec2 instance in the web UI, right click it -> Security -> Modify IAM Role. Otherwise, just open the IAM console
Click Roles -> Create role
Click EC2
Click Next: Permissions
Click Create policy
Click JSON
Copy the json from here:
{
  "Version": "2012-10-17",
  "Statement": [
    {
      "Effect": "Allow",
      "Action": ["s3:ListBucket"],
      "Resource": "arn:aws:s3:::awsexamplebucket"
    },
    {
      "Effect": "Allow",
      "Action": ["s3:GetObject"],
      "Resource": "arn:aws:s3:::awsexamplebucket/*"
    }
  ]
}
Change
awsexamplebucketto the name of your bucket and click Review policySpecify a Name for the policy and click Create policy
Mount bucket as local directory
Warning, this is painfully slow once you have it set up.
Follow the instructions found on this site.
Then, run this script:
#!/bin/bash
folder="/tmp/folder"
if [ ! -d $folder ]; then
    mkdir $folder
fi

s3fs bucket_name $folder -o passwd_file=${HOME}/.passwd-s3fs -o volname="S3-Bucket"
Get KMS ID for a bucket
aws s3api get-bucket-encryption \
  --bucket $(aws s3 ls | grep -i bucketname | awk '{print $3}') \
    | jq '.ServerSideEncryptionConfiguration.Rules[0].ApplyServerSideEncryptionByDefault.KMSMasterKeyID' \
    | awk -F '/' '{print $2}' \
    | tr -d '"'
Resources:
Anonymous upload to s3 bucket with curl
curl -X PUT --upload-file "./bla" -k "https://s3-${AWS_DEFAULT_REGION}.amazonaws.com/${BUCKET_NAME}/"
Resource: https://gist.github.com/jareware/d7a817a08e9eae51a7ea
Find buckets with a specific string and delete them
aws s3 ls | grep -i ttp4 | awk '{print $3}' | xargs -I {} aws s3 rb s3://{} --force
Metadata
Query v2
TOKEN=$(curl -s -X PUT "http://169.254.169.254/latest/api/token" \
  -H "X-aws-ec2-metadata-token-ttl-seconds: 21600")

# Query the service
curl -H "X-aws-ec2-metadata-token: ${TOKEN}" \
  -v http://169.254.169.254/latest/meta-data/
Resource: https://docs.aws.amazon.com/AWSEC2/latest/UserGuide/configuring-instance-metadata-service.html
Get Credentials
curl http://169.254.169.254/latest/meta-data/iam/security-credentials/
Resource: https://gist.github.com/quiver/87f93bc7df6da7049d41
Get region
curl --silent 169.254.169.254/latest/dynamic/instance-identity/document \
  | jq -r .region
Resource: https://gist.github.com/quiver/87f93bc7df6da7049d41
Get role-name
curl http://169.254.169.254/latest/meta-data/iam/security-credentials/
Resource: https://docs.aws.amazon.com/AWSEC2/latest/UserGuide/ec2-instance-metadata.html
Get Account ID
curl http://169.254.169.254/latest/meta-data/identity-credentials/ec2/info/
Get public hostname
curl 169.254.169.254/latest/meta-data/public-hostname
Programmatically set AWS_ACCOUNT_ID
Option #1:
export AWS_ACCOUNT_ID=$(aws sts get-caller-identity --query "Account" --output text)
Option #2 (with jq):
aws sts get-caller-identity | jq '.Account'
Resources:
- https://shapeshed.com/jq-json/#how-to-find-a-key-and-value
- https://towardsthecloud.com/find-aws-account-id#:~:text=To%20find%20your%20AWS%20account,to%20view%20the%20account%20ID.
Python SDK (boto)
Create session
from boto3.session import Session

def create_session():
  session = Session(aws_access_key_id=access_key,aws_secret_access_key=secret_key,aws_session_token=session_token)
  return session
Resource: https://stackoverflow.com/questions/30249069/listing-contents-of-a-bucket-with-boto3
Get AMI id
This uses run_cmd from
python-notes.
import json

def get_ami_id(ec2_output):
    json.loads(ec2_output.decode('utf-8'))['Images'][0]['ImageId']

ec2_output = run_cmd('aws ec2 describe-images --filters "Name=name,Values=<AMI Name>" --output json')
ami_id = get_ami_id(ec2_output)
print(ami_id)
List buckets with boto
def get_s3_buckets(session):
  s3 = session.resource('s3')
  print("Bucket List:")
  for bucket in s3.buckets.all():
    print(bucket.name)
Resource: https://stackoverflow.com/questions/36042968/get-all-s3-buckets-given-a-prefix
Show items in an s3 bucket
def list_s3_bucket_items(session, bucket):
  s3 = session.resource('s3')
  my_bucket = s3.Bucket(bucket)

  for file in my_bucket.objects.all():
    print(file.key)
List Users
def get_users(session):
  client = boto3.client('iam', aws_access_key_id=access_key, aws_secret_access_key=secret_key,aws_session_token=session_token)
  users = client.list_users()
  for key in users['Users']:
    print(key['UserName'])
Resource: https://stackoverflow.com/questions/46073435/how-can-we-fetch-iam-users-their-groups-and-policies
Get account id with boto
def sts(session):
  sts_client = boto3.client('sts',aws_access_key_id=access_key,aws_secret_access_key=secret_key, aws_session_token=session_token)
  print(sts_client.get_caller_identity()['Account'])
Create and tag ec2 instance
EC2_RESOURCE = boto3.resource('ec2')

def create_ec2_instance():
    instance = EC2_RESOURCE.create_instances(
        ImageId='ami-ID_GOES_HERE',
        MinCount=1,
        MaxCount=1,
        InstanceType='t2.micro',
        SecurityGroupIds = ["sg-ID_GOES_HERE"]
        KeyName='KEY_NAME_GOES_HERE',
        TagSpecifications=[
            {
                'ResourceType': 'instance',
                'Tags': [
                    {
                        'Key': 'Name',
                        'Value': 'INSTANCE_NAME_HERE'
                    }
                ]
            }
        ]
    )
    return instance[0]
Resources: https://blog.ipswitch.com/how-to-create-an-ec2-instance-with-python https://stackoverflow.com/questions/52436835/how-to-set-tags-for-aws-ec2-instance-in-boto3 http://blog.conygre.com/2017/03/27/boto-script-to-launch-an-ec2-instance-with-an-elastic-ip-and-a-route53-entry/
Allocate and associate an elastic IP
import boto3
from botocore.exceptions import ClientError

# Wait for instance to finish launching before assigning the elastic IP address
print('Waiting for instance to get to a running state, please wait...')
instance.wait_until_running()

EC2_CLIENT = boto3.client('ec2')

try:
    # Allocate an elastic IP
    eip = EC2_CLIENT.allocate_address(Domain='vpc')

    # Associate the elastic IP address with an instance launched previously
    response = EC2_CLIENT.associate_address(
                   AllocationId=eip['AllocationId'],
                   InstanceId='INSTANCE_ID_GOES_HERE'
               )
    print(response)
except ClientError as e:
    print(e)
Allocate existing elastic IP
EC2_CLIENT.associate_address(
    AllocationId='eipalloc-EXISTING_EIP_ID_GOES_HERE',
    InstanceId=INSTANCE_ID_GOES_HERE
)
Resources: https://boto3.amazonaws.com/v1/documentation/api/latest/guide/ec2-example-elastic-ip-addresses.html http://blog.conygre.com/2017/03/27/boto-script-to-launch-an-ec2-instance-with-an-elastic-ip-and-a-route53-entry/
Wait for instance to finish starting
retries = 10
retry_delay = 10
retry_count = 0
instance[0].wait_until_running()
instance[0].reload()
while retry_count <= retries:
    sock = socket.socket(socket.AF_INET, socket.SOCK_STREAM)
    result = sock.connect_ex((instance[0].public_ip_address,22))
    if result == 0:
        print(f"The instance is up and accessible on port 22 at {instance[0].public_ip_address}")
        break
    else:
        print("Instance is still coming up, retrying . . . ")
        time.sleep(retry_delay)
Resource: https://stackoverflow.com/questions/46379043/boto3-wait-until-running-doesnt-work-as-desired
Process CloudTrail logs and generate IAM policy
This script fetches CloudTrail logs for a specified user from kops-actions.json, parses the actions performed by that user, and generates an IAM policy
based on those actions. It handles datetime serialization for JSON and ensures
that the IAM policy is saved to kops-iam-policy.json.
import json
from collections import defaultdict
from datetime import datetime

# Define the user to filter actions
user = 'kops'

def default_converter(o):
    if isinstance(o, datetime):
        return o.isoformat()
    raise TypeError(f'Object of type {o.__class__.__name__} is not JSON serializable')

def main():
    # Load the CloudTrail logs
    try:
        with open('kops-actions.json', 'r') as f:
            data = json.load(f)
            if 'Events' not in data:
                print("No 'Events' key in the JSON data")
                return
            events = data['Events']
    except (json.JSONDecodeError, FileNotFoundError) as e:
        print(f"Error loading JSON data: {e}")
        return

    # Parse the actions performed by the specified user
    actions = defaultdict(set)
    for event in events:
        event_name = event.get('EventName')
        event_source = event.get('EventSource')
        if event_name and event_source:
            service_name = event_source.split('.')[0]
            actions[service_name].add(event_name)

    # Generate the IAM policy
    policy = {
        "Version": "2012-10-17",
        "Statement": []
    }

    for service, actions in actions.items():
        statement = {
            "Effect": "Allow",
            "Action": [f"{service}:{action}" for action in actions],
            "Resource": "*"
        }
        policy['Statement'].append(statement)

    # Save the policy to a file
    try:
        with open('kops-iam-policy.json', 'w') as f:
            json.dump(policy, f, indent=2, default=default_converter)
        print("IAM policy generated and saved to kops-iam-policy.json")
    except IOError as e:
        print(f"Error saving JSON data: {e}")

if __name__ == '__main__':
    main()
Go SDK
Stand up EC2 Instance
This accounts for the exceptionally annoying message:
An error occurred (VPCIdNotSpecified) when calling the RunInstances operation: No default VPC for this user.
Essentially, this means that a default VPC isn’t defined and subsequently you need to provide a subnet id:
package main

import (
    "github.com/aws/aws-sdk-go/aws"
    "github.com/aws/aws-sdk-go/aws/session"
    "github.com/aws/aws-sdk-go/service/ec2"

    "fmt"
    "log"
)

func main() {

    // Get credentials from ~/.aws/credentials
    sess, err := session.NewSession(&aws.Config{
        Region: aws.String("us-west-2")},
    )

    // Create EC2 service client
    svc := ec2.New(sess)

    // Specify the details of the instance that you want to create.
    runResult, err := svc.RunInstances(&ec2.RunInstancesInput{
        ImageId:      aws.String("ami-id-here"),
        InstanceType: aws.String("t2.small"),
        MinCount:     aws.Int64(1),
        MaxCount:     aws.Int64(1),
        SecurityGroupIds: aws.StringSlice([]string{"sg-id-here"}),
        KeyName: aws.String("keypairname-here"),
        SubnetId:     aws.String("subnet-id-here"),
    })

    if err != nil {
        fmt.Println("could not create instance", err)
        return
    }

    fmt.Println("Created instance ", *runResult.Instances[0].InstanceId)

    // Add tags to the created instance
    _, errtag := svc.CreateTags(&ec2.CreateTagsInput{
        Resources: []*string{runResult.Instances[0].InstanceId},
        Tags: []*ec2.Tag{
            {
                Key:   aws.String("Name"),
                Value: aws.String("GoInstance"),
            },
        },
    })
    if errtag != nil {
        log.Println("could not create tags for instance", runResult.Instances[0].InstanceId, errtag)
        return
    }

    fmt.Println("Successfully tagged instance")
}
Resources:
- Good starting guide
- https://gist.github.com/stephen-mw/9f289d724c4cfd3c88f2
- Provided me with the solution to finish this example
- https://docs.aws.amazon.com/sdk-for-go/api/aws/#StringSlice
Stand up EC2 Instance with lambda
Modify this code to get to a starting point.
Create function binary:
env GOOS=linux GOARCH=amd64 go build -o /tmp/mainZip it up:
zip -j /tmp/main.zip /tmp/mainCreate IAM rule for the function:
Navigate to https://console.aws.amazon.com/iam/home#/roles
Click Create role
Click Lambda
Click Next: Permissions
Add the following policies:
AmazonEc2FullAccess
AWSLambdaBasicExecutionRole
AWSLambdaVPCAccessExecutionRole
Click Next: Tags
Give it a Name tag and click Next: Review
Give it a Role name such as “LambdaCreateEc2Instance”
Click Create role
Once it’s completed, click the role and copy the Role ARN
Create the lambda function:
aws lambda create-function \
  --function-name createEc2Instance \
  --runtime go1.x \
  --zip-file fileb:///tmp/main.zip --handler main \
  --role $ROLE_FROM_STEP_4
Populate all of the environment variables:
aws lambda update-function-configuration \
 --function-name createEc2Instance \
 --environment \
   "Variables={AMI=ami-id-here, INSTANCE_TYPE=t2.small, SECURITY_GROUP=sg-id-here, KEYNAME=keypairname-here, SUBNET_ID=subnet-id-here}"
Alternatively, you can set the values in the lambda UI by clicking Manage environment variables:
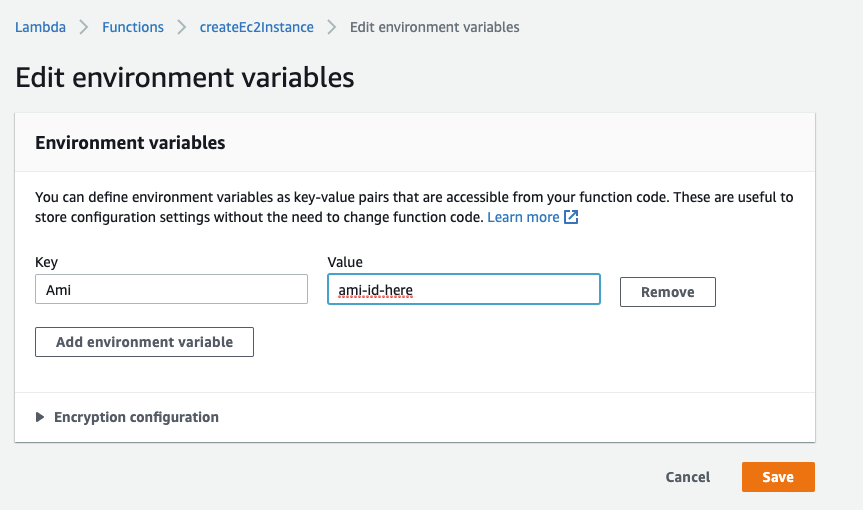
but this gets very tedious very quickly.
All that’s left at this point is to invoke the function and see if it works.
Lambda Makefile Example
all: build deploy run

build:
  env GOOS=linux GOARCH=amd64 go build -o /tmp/main

deploy:
  zip -j /tmp/main.zip /tmp/main
  bash scripts/create_function.sh
  bash scripts/create_env_vars.sh

run:
  aws lambda invoke --function-name createEc2Instance /tmp/output.json
Invoke lambda function
aws lambda invoke --function-name createEc2Instance /tmp/output.json
Resources:
Set Return Response for API Gateway
You have two options here:
return events.APIGatewayProxyResponse{
   StatusCode: http.StatusBadGateway,
   Headers: map[string]string{
    "Access-Control-Allow-Origin":      "*",
    "Access-Control-Allow-Credentials": "true",
   },
   Body: string("Method not Allowed"),
  }, nil
or alternatively:
resp := events.APIGatewayProxyResponse{Headers: make(map[string]string)}
resp.Headers["Access-Control-Allow-Origin"] = "*"
resp.Headers["Access-Control-Allow-Credentials"] = "true"
resp.StatusCode = http.StatusOK
resp.Body = string(publicInstanceIp)
return resp, nil
Resources:
Update function via CLI
This is useful to run after updating your code. This will grab main.zip from
the current directory:
FUNC=myLambdaFuncName
env GOOS=linux GOARCH=amd64 go build -o main
zip -j main.zip main
aws lambda update-function-code --function-name "${FUNC}" \
  --zip-file "fileb:///${PWD}/main.zip"
CORS with lambda and API Gateway
Want to do AJAX stuff with your lambda function(s) you wrote in golang? Great! You’re in the right place.
Open your gateway
Click Actions -> Enable CORS
Check the boxes for POST, GET, and OPTIONS
Input the following for Access-Control-Allow-Headers:
'Content-Type,X-Amz-Date,Authorization,X-Api-Key,X-Amz-Security-Token'Input the following for Access-Control-Allow-Origin:
'*'Click Enable CORS and replace existing CORS headers
Configure Options Method
Open the Method Response and click the arrow next to 200. Add the following headers:
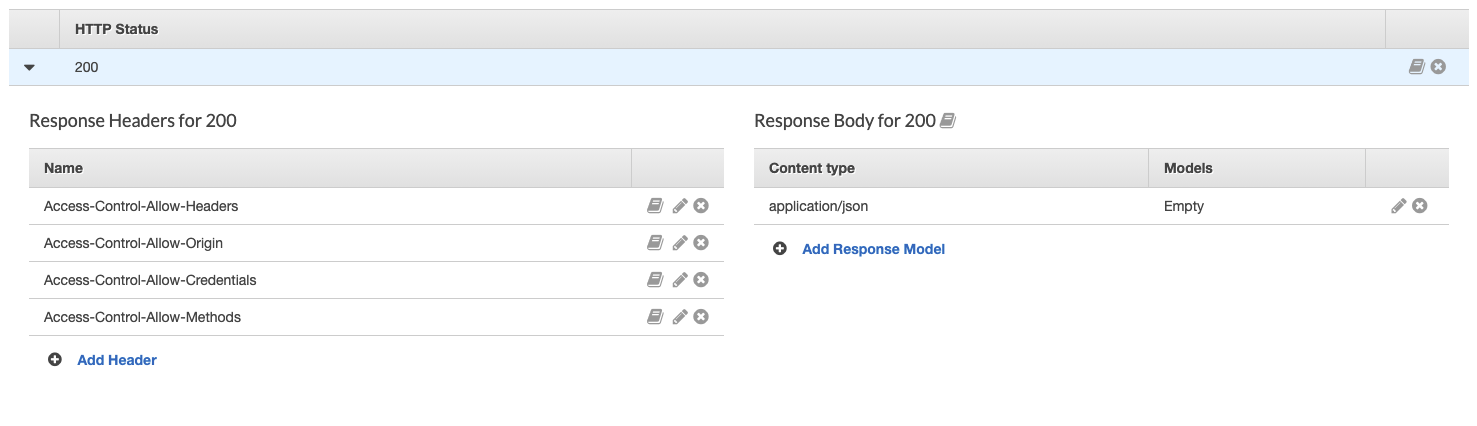
Configure GET Method
Be sure to add the appropriate headers to your APIGatewayProxyResponse:
Headers: map[string]string{
    "Access-Control-Allow-Origin":      "*",
    "Access-Control-Allow-Credentials": "true",
   },
Next, open the Method Response and click the arrow next to 200. Add the following headers:

Configure POST Method
Open the Method Response and click the arrow next to 200. Add the following
header:

Finishing touches
Finally, be sure to click Actions and Deploy API when you’re done
Resource: https://docs.aws.amazon.com/apigateway/latest/developerguide/how-to-cors-console.html
Serverless Framework
This framework streamlines developing and deploying serverless workloads.
Install the Serverless Framework:
npm install -g serverlessCreate project
# Nodejs Lambda
serverless create -t aws-nodejs -p myservice

# Golang Lambda
cd $GOPATH/src && serverless create -t aws-go-dep -p myservice
Populate the
serverless.ymltemplate. This will use the lambda code from above that deploys ec2 instances:service: lambdainstancedeployer frameworkVersion: "2" provider: name: aws runtime: go1.x stage: ${opt:stage, 'dev'} region: ${opt:region, 'us-west-2'} environment: DYNAMO_TABLE: ${self:service}-${opt:stage, self:provider.stage} memorySize: 3008 timeout: 30 # API Gateway max timeout iamRoleStatements: - Effect: Allow Action: - dynamodb:Query - dynamodb:Scan - dynamodb:GetItem - dynamodb:PutItem - dynamodb:UpdateItem - dynamodb:DeleteItem Resource: "arn:aws:dynamodb:${opt:region, self:provider.region}:*:table/${self:provider.environment.DYNAMO_TABLE}" - Effect: Allow Action: - ec2:RunInstances - ec2:DescribeInstances - ec2:DescribeInstanceStatus - ec2:TerminateInstances - ec2:StopInstances - ec2:StartInstances - ec2:CreateTags - ec2:DeleteTags Resource: "*" package: exclude: - ./** include: - ./bin/** functions: myLambdaService: handler: bin/myLambdaService events: - http: path: /deployer method: post cors: true - http: path: /deployer method: get cors: true environment: AMI: ami-xxxxxx INSTANCE_TYPE: t2.small REGION: us-west-2 resources: Resources: InstanceDeployerDynamoDbTable: Type: "AWS::DynamoDB::Table" # Uncomment if you want to want to ensure the table isn't deleted # DeletionPolicy: Retain DeletionPolicy: Delete Properties: AttributeDefinitions: - AttributeName: email AttributeType: S KeySchema: - AttributeName: email KeyType: HASH BillingMode: PAY_PER_REQUEST TableName: ${self:provider.environment.DYNAMO_TABLE}Note: This template will also create an API gateway, IAM role and DynamoDB table.
Compile the function and build it:
cd myservice && make build
Resources:
- Lambda + Golang + Serverless walkthrough
- Useful information for IAM actions needed for ec2 operations
- Set dynamodb iam permissions
- Delete or retain a dynamoDB table
Generated Project Optimizations
Move your functions into a
functionsfolder.Change the
Makefileto the following:
functions := $(shell find functions -name \*main.go | awk -F'/' '{print $$2}')

build: # Build golang binary
@for function in $(functions) ; do \
  cd functions/$$function ; \
  env GOOS=linux go build -ldflags="-s -w" -o ../../bin/$$function ; \
  cd .. ; \
 done
 serverless deploy

destroy:
 serverless remove
These changes will output function binaries in bin/ at the top level of your
project.
Resource: Makefile example
Decode Error Message from CloudWatch Logs
msg="themessage"
aws sts decode-authorization-message \
  --encoded-message $msg --query DecodedMessage \
  --output text | jq '.'
Resource: https://aws.amazon.com/premiumsupport/knowledge-center/aws-backup-encoded-authorization-failure/
Secrets Manager
Create IAM role to grant read access to a secret
If accessing from an ec2 instance, find your ec2 instance in the web UI, right click it -> Security -> Modify IAM Role. Otherwise, just open the IAM console
Click Roles -> Create role
Click EC2
Click Next: Permissions
Click Create policy
Click JSON
Copy the json from here:
{
  "Version": "2012-10-17",
  "Statement": [
    {
      "Sid": "VisualEditor0",
      "Effect": "Allow",
      "Action": [
        "secretsmanager:GetResourcePolicy",
        "secretsmanager:GetSecretValue",
        "secretsmanager:DescribeSecret",
        "secretsmanager:ListSecretVersionIds"
      ],
      "Resource": "<your secret ARN>"
    },
    {
      "Sid": "VisualEditor1",
      "Effect": "Allow",
      "Action": "secretsmanager:ListSecrets",
      "Resource": "*"
    }
  ]
}
Change
<your secret ARN>to the proper value of your secret, which you can find in the Secrets Manager UI and click Review policySpecify a Name for the policy and click Create policy
Resource: https://docs.aws.amazon.com/mediaconnect/latest/ug/iam-policy-examples-asm-secrets.html
Get secret from secrets manager and output to file
aws secretsmanager get-secret-value \
  --secret-id $SECRET_ID \
  --query SecretString \
  --output text \
    | tee $DELETE_ME
Resource: https://stackoverflow.com/questions/50911540/parsing-secrets-from-aws-secrets-manager-using-aws-cli
Get several secrets
users=(user1 user2 user3)
environment='prod'
for user in "${users[@]}"; do
  sec=$(aws secretsmanager get-secret-value --secret-id $environment-$user \
    --query SecretString \
    --output text)
  echo "Secret for $environment-$user is $sec"
done
Create new secret from a file
aws secretsmanager create-secret \
  --name MyTestDatabaseSecret \
  --description "My test database secret created with the CLI" \
  --secret-string file://mycreds.json \
  --output text
Resource: https://docs.aws.amazon.com/cli/latest/reference/secretsmanager/create-secret.html
Add access key and secret access key as secrets
aws secretsmanager create-secret \
  --name "prod/someuser_aws_access_key_id" \
  --description "someuser prod aws_access_key_id" \
  --secret-string "$(sed '2q;d' ~/.aws/credentials \
    | awk '{print $3}')" \
    --output text

aws secretsmanager create-secret \
  --name "prod/someuser_aws_secret_access_key" \
  --description "someuser prod aws_secret_access_key" \
  --secret-string "$(sed '3q;d' ~/.aws/credentials \
    | awk '{print $3}')" \
    --output text
List secrets
aws secretsmanager list-secrets --output text
Update secret from a file
aws secretsmanager update-secret \
  --secret-id $SECRET_NAME_OR_ARN \
  --description "great secret - A+" \
  --secret-string "file://somesecret" \
  --output text
Delete secret without waiting period
aws secretsmanager delete-secret \
  --secret-id $SECRET_NAME_OR_ARN \
  --force-delete-without-recovery
Resources:
Delete secret in multiple regions
regions=(us-west-1 eu-west-2)
SECRET=$MY_SECRET_ID
for region in ${regions[@]};
  do aws secretsmanager delete-secret \
  --secret-id $SECRET --force-delete-without-recovery \
  --region $region | jq; done
Add SSH key to secretsmanager
aws secretsmanager create-secret --name ssh_key --secret-string file://~/.ssh/mykey.pem
Retrieve SSH key from secretsmanager
If you have an SSH key in Secrets Manager, you can run the following to grab it and put it into a file on your local system:
aws secretsmanager get-secret-value --secret-id ssh_key | jq -r '.SecretString' | tee ~/.ssh/ssh_key && chmod 400 ~/.ssh/ssh_key
CloudTrail
Get ec2 termination date
This will require you to have the instance id of the terminated instance and a rough sense of when it was terminated.
- Open the CloudTrail service
- Click Event history
- Select Event name from the dropdown
- Input
TerminateInstances - Search for the terminated instance id under the Resource name column
Resource: https://aws.amazon.com/premiumsupport/knowledge-center/cloudtrail-search-api-calls/
Fetch ListBuckets events from time period
DAYS=7
aws cloudtrail lookup-events --lookup-attributes AttributeKey=EventName,AttributeValue=ListBuckets \
  --start-time $(python -c "import datetime; print((datetime.datetime.now() - datetime.timedelta(days=$DAYS)).isoformat()+'Z')") \
  | jq -c '.Events[] | select(.EventName=="ListBuckets")'
IAM
Create user
USERNAME='kops'
aws iam create-user \
  --user-name "${USERNAME}" \
  --output json
Delete user
USERNAME='kops'
aws iam delete-user \
  --user-name "${USERNAME}" \
  --output json
Create access keys for a user
USERNAME='kops'
aws iam create-access-key --user-name "${USERNAME}" \
  --query 'AccessKey.[AccessKeyId,SecretAccessKey]' --output text
Resource: https://github.com/kubernetes/kops/blob/master/docs/getting_started/aws.md#setup-iam-user
Get credentials as vars
USERNAME='kops'
credentials=$(aws iam create-access-key \
  --user-name "${USERNAME}" \
  --query 'AccessKey.[AccessKeyId,SecretAccessKey]' \ --output text)

secret_access_key=$(echo ${credentials} | cut --complement -d " " -f 1)

echo "The access key ID  of "${username}" is $access_key_id "

echo "The Secret access key of "${username}" is $secret_access_key "
Resource: https://automateinfra.com/2021/03/30/how-to-create-a-iam-user-on-aws-account-using-shell-script/
List users
aws iam list-users
Print all usernames
usernames=($(aws iam list-users --output text | cut -f 7))

for user in ${usernames[@]}; do
  echo $user
done
Resource: https://gist.github.com/apolloclark/b3f60c1f68aa972d324b
List policies
aws iam list-policies
List managed apologies attached to a role
aws iam list-attached-role-policies \
  --role-name $ROLE_NAME
Resource: https://docs.aws.amazon.com/cli/latest/reference/iam/list-attached-role-policies.html
List inline policies embedded in a role
aws iam list-role-policies \
  --role-name $ROLE_NAME
Resource: https://docs.aws.amazon.com/cli/latest/reference/iam/list-role-policies.html
Delete policy
aws iam delete-policy \
  --policy-arn $ARN
Delete policies with word terraform in them
aws iam list-policies \
  | grep terraform \
  | grep arn \
  | awk '{print $2}' \
  | tr -d '"' \
  | tr -d ',' \
  | xargs -I{} aws iam delete-policy --policy-arn {}
Delete role and associated policies
delete_role_with_instance_profiles_and_policies() {
    ROLE_NAME="$1"

    # List instance profiles for role, get InstanceProfileName
    INSTANCE_PROFILE_NAMES=$(aws iam list-instance-profiles-for-role --role-name "$ROLE_NAME" --query "InstanceProfiles[].InstanceProfileName" --output text)

    # For each instance profile, remove the role
    for INSTANCE_PROFILE_NAME in $INSTANCE_PROFILE_NAMES; do
        aws iam remove-role-from-instance-profile --instance-profile-name "$INSTANCE_PROFILE_NAME" --role-name "$ROLE_NAME"
    done

    # List policies attached to the role, get PolicyArn
    POLICY_ARNS=$(aws iam list-attached-role-policies --role-name "$ROLE_NAME" --query "AttachedPolicies[].PolicyArn" --output text)

    # For each policy, detach it from the role
    for POLICY_ARN in $POLICY_ARNS; do
        aws iam detach-role-policy --role-name "$ROLE_NAME" --policy-arn "$POLICY_ARN"
    done

    # Delete the role
    aws iam delete-role --role-name "$ROLE_NAME"
}

delete_role_with_instance_profiles_and_policies "my_role"
Create instance profile
aws iam create-instance-profile \
  --instance-profile-name $PROFILE_NAME
Resource: https://cloudaffaire.com/how-to-add-an-ec2-instance-to-aws-system-manager-ssm/
List instance profiles
aws iam list-instance-profiles
View roles tied to instance profile
aws iam get-instance-profile --instance-profile-name "${TARGET_PROFILE}"
Remove instance profile from role
aws iam remove-role-from-instance-profile \
    --instance-profile-name "${TARGET_PROFILE}" --role-name "${ASSOCIATED_ROLE}"
Associate role with instance profile
aws iam add-role-to-instance-profile \
  --role-name YourNewRole \
  --instance-profile-name YourNewRole-Instance-Profile
Delete instance profile
aws iam delete-instance-profile \
  --instance-profile-name $PROFILE_NAME
Associate Instance Profile with Instance
aws ec2 associate-iam-instance-profile \
  --instance-id YourInstanceId \
  --iam-instance-profile Name=YourNewRole-Instance-Profile
Attach IAM instance profile to ec2 instance via UI
- Open the Amazon EC2 console
- Click Instances
- Click the instance you want to access the s3 bucket from
- Click Actions in the upper right-hand side of the screen
- Click Security -> Modify IAM role
- Enter the name of the IAM role created previously
- Click Save
To download files from the S3 bucket, follow the steps at the top of the page
under INSTALL LATEST VERSION OF AWS CLI ON LINUX to get the AWS cli utils in
order to grab stuff from the bucket.
Resources:
Get assumed roles in instance
aws sts get-caller-identity
Use instance profile credentials in ec2 instance
To get the $PROFILE_NAME value, go into the instance and curl against the
http://169.254.169.254/latest/meta-data/iam/security-credentials/ endpoint.
IMDSv2
TOKEN=$(
  curl -s -X PUT "http://169.254.169.254/latest/api/token" \
  -H "X-aws-ec2-metadata-token-ttl-seconds: 21600")

export AWS_ACCESS_KEY_ID=$(
  curl -H "X-aws-ec2-metadata-token: $TOKEN" -v \
  http://169.254.169.254/latest/meta-data/iam/security-credentials/$PROFILE_NAME \
    | jq -r .AccessKeyId)

export AWS_SECRET_ACCESS_KEY=$(
  curl -H "X-aws-ec2-metadata-token: $TOKEN" -v \
  http://169.254.169.254/latest/meta-data/iam/security-credentials/$PROFILE_NAME \
   | jq -r .SecretAccessKey)

export AWS_SESSION_TOKEN=$(
  curl -H "X-aws-ec2-metadata-token: $TOKEN" -v \
  http://169.254.169.254/latest/meta-data/iam/security-credentials/$PROFILE_NAME \
    | jq -r .Token)
IMDSv1
export AWS_ACCESS_KEY_ID=$(
  curl -s \
    http://169.254.169.254/latest/meta-data/iam/security-credentials/$PROFILE_NAME \
    | jq -r .AccessKeyId)

export AWS_SECRET_ACCESS_KEY=$(
  curl -s \
    http://169.254.169.254/latest/meta-data/iam/security-credentials/$PROFILE_NAME \
    | jq -r .SecretAccessKey)

export AWS_SESSION_TOKEN=$(
   curl -s \
    http://169.254.169.254/latest/meta-data/iam/security-credentials/$PROFILE_NAME \
    | jq -r .Token)
Cloud-init
Validate cloud-init
cloud-init devel schema --config-file bob.yaml
Resource: https://stackoverflow.com/questions/54427198/cloud-init-validator
Delete cloud-init logs
cloud-init clean --logs
Log locations for cloud-init
/var/log/cloud-init.log
/var/log/cloud-init-output.log
/run/cloud-init
/var/lib/cloud/instance/user-data.txt
These commands can provide useful insights as well:
dmesg output
journalctl output
Resource: https://cloudinit.readthedocs.io/en/latest/topics/cli.html
View userdata
cat /var/lib/cloud/instance/cloud-config.txt
Wait for instance to be initialized
# Wait for Initialization
# Waits until the newly created EC2 instance changes its status
# from "initializing" to another state, signaling that initialization
# has completed.
#
# Usage:
#   wait_for_initialization
#
# Output:
#   No output, but pauses script execution until the EC2 instance has finished initializing.
#
# Example(s):
#   wait_for_initialization
wait_for_initialization()
                          {
    instance_status="initializing"
    while [[ "$instance_status" == "initializing" || "$instance_status" == "null" ]]; do
        instance_status=$(aws ec2 describe-instance-status --instance-id ${INSTANCE_ID} \
            | jq -r ".InstanceStatuses[0].InstanceStatus.Status")
        sleep 10
    done
}
Create and Tag EC2 Instance
# Create EC2 Instance
# Creates an EC2 instance with the specified AMI, instance type, and security group.
#
# Usage:
#   create_ec2_instance
#
# Output:
#   Outputs the ID of the created EC2 instance.
#
# Example(s):
#   create_ec2_instance
create_ec2_instance()
{
    INSTANCE_TYPE="t3.micro"
    IAM_INSTANCE_PROFILE="AmazonSSMInstanceProfileForInstances"
    INSTANCE_NAME="my-instance"

    SECURITY_GROUP_ID=$(authorize_security_group_ingress "sg" "sg-desc" "${VPC_ID}" "tcp" 22 "0.0.0.0/0" | tail -n 1)

    INSTANCE_ID=$(aws ec2 run-instances \
        --image-id "$AMI_ID" \
        --count 1 \
        --instance-type "$INSTANCE_TYPE" \
        --security-group-ids "$SECURITY_GROUP_ID" \
        --subnet-id "$DEFAULT_SUBNET_ID" \
        --iam-instance-profile "Name=$IAM_INSTANCE_PROFILE" \
        --tag-specifications "ResourceType=instance,Tags=[{Key=Name,Value=$INSTANCE_NAME}]" \
        --query 'Instances[0].InstanceId' \
        --output text)

    wait_for_initialization

    if [ -z "$INSTANCE_ID" ]; then
        echo "Failed to create EC2 instance"
        exit 1
    fi
    echo "Created EC2 instance: $INSTANCE_ID" >&2
    echo "${INSTANCE_ID}"
}
Wait for cloud-init to finish
wait_for_cloud_init() {
    while true; do
        if [[ $(find /var/lib/cloud/instances -maxdepth 2 -name 'boot-finished' -print -quit) ]]; then
            break
        else
            sleep 5
        fi
    done
}

wait_for_cloud_init
Another option for waiting on cloud-init
state="running"
while [[ "$state" != "done" ]]; do
    state=$(cloud-init status | awk -F ': ' '{print $2}')
    sleep 5
done
Resources:
- https://medium.com/beardydigital/using-bash-to-wait-for-things-to-happen-waiting-with-bash-ce8732792e30
- https://stackoverflow.com/questions/33019093/how-do-detect-that-cloud-init-completed-initialization
Tag instance when cloud-init finished
tag_finished() {
    TOKEN=$(curl -s -X PUT "http://169.254.169.254/latest/api/token" -H "X-aws-ec2-metadata-token-ttl-seconds: 21600")
    export AWS_DEFAULT_REGION=$(curl -s -H "X-aws-ec2-metadata-token: $TOKEN" -v http://169.254.169.254/latest/dynamic/instance-identity/document | grep region | cut -d \" -f4)
    INSTANCE_ID=$(curl -s -H "X-aws-ec2-metadata-token: $TOKEN" -v http://169.254.169.254/latest/meta-data/instance-id)
    aws ec2 create-tags --resources "$INSTANCE_ID" --tags 'Key=cloudinit-complete,Value=true'
}

tag_finished
Resource: https://stackoverflow.com/questions/62116684/how-to-make-terraform-wait-for-cloudinit-to-finish
Wait for tagged instance
found=false
instance_id=i-.......

while [[ $found == false ]]; do
    instance_tag=$(aws ec2 describe-tags \
      --filters 'Name=resource-id,Values=${instance_id}' 'Name=key,Values=cloudinit-complete' \
      --output text \
      --query 'Tags[*].Value')
    if [[ $instance_tag == true ]]; then
        found=true
    fi
done
Resource: https://stackoverflow.com/questions/62116684/how-to-make-terraform-wait-for-cloudinit-to-finish
DynamoDB
List Tables
aws dynamodb list-tables
Resource: https://docs.aws.amazon.com/cli/latest/reference/dynamodb/list-tables.html
Get specific table
TABLE_NAME="$(aws dynamodb list-tables | grep -i lab | cut -d '"' -f2)"
Get Table Schema
aws dynamodb describe-table --table-name "${TABLE_NAME}" | jq
Retrieve Table Contents
TABLE_CONTENTS="$(aws dynamodb scan \
  --table-name "${TABLE_NAME}" --output text)"

echo "${TABLE_CONTENTS}"
Delete Table
TABLE=yourtable
aws dynamodb delete-table --table-name $TABLE
SSM
Install session manager plugin on MacOS
brew install cask session-manager-plugin --no-quarantine
Resource:
Set default shell and script to run for instances
Scroll down to Linux shell profile
Input the following to run zsh if it is installed:
if [[ "$(which zsh)" ]]; then
  "$(which zsh)"
fi
cd "${HOME}"
Click Save
Resource: https://aws.amazon.com/premiumsupport/knowledge-center/ssm-session-manager-change-shell/
Show managed SSM instances
aws ssm describe-instance-information
List parameters
aws ssm describe-parameters
Access a parameter
aws ssm get-parameter --name /path/to/parameter
Get Instance Status
aws ssm get-inventory --filter "Key=AWS:InstanceInformation.InstanceId,Values=${INSTANCE_ID}" | \
        jq -r '.Entities[].Data[].Content[].InstanceStatus'
Get instance role credentials via SSM
# Get Instance Role Credentials
# Retrieves the IAM role credentials from the specified EC2 instance.
#
# Usage:
#   get_instance_role_credentials
#
# Output:
#   Outputs the IAM role credentials.
#
# Example(s):
#   get_instance_role_credentials
get_instance_role_credentials()
                                {
    COMMAND_ID=$(aws ssm send-command --instance-ids "$INSTANCE_ID" --document-name AWS-RunShellScript --parameters 'commands=["curl http://169.254.169.254/latest/meta-data/iam/security-credentials/'"$ROLE_NAME"'"]' --query "Command.CommandId" --output text)
    wait_for_command "$COMMAND_ID"
    CREDENTIALS=$(aws ssm get-command-invocation --command-id "$COMMAND_ID" --instance-id "$INSTANCE_ID" --query 'StandardOutputContent' --output text)
    echo "$CREDENTIALS"
}
Install SSM Agent Manually on Ubuntu ec2 instance
sudo snap install amazon-ssm-agent --classic
sudo systemctl start snap.amazon-ssm-agent.amazon-ssm-agent.service
Resource: https://docs.aws.amazon.com/systems-manager/latest/userguide/agent-install-ubuntu.html
Execute command over SSM
This particular example will run ifconfig on the target instance:
aws ssm send-command \
    --instance-ids "${INSTANCE_ID}" \
    --document-name "AWS-RunShellScript" \
    --comment "Get IP Address" \
    --parameters "commands=ifconfig"
Resource: https://fossies.org/linux/aws-cli/awscli/examples/ssm/send-command.rst
Function to execute command over SSM
# run_ssm_command
#
# Sends a command to the specified instance using AWS Systems Manager (SSM). It waits until the command has been
# executed before retrieving and returning the output.
#
# Usage:
#   run_ssm_command [command]
#
# Arguments:
#   command - The command to be executed on the remote instance.
#
# Output:
#   Returns the output of the SSM command that was executed.
#
# Example(s):
#   run_ssm_command "ls -l"
run_ssm_command() {
    local command_to_run=$1

    # Send the command to the instance and save the command ID
    command_id=$(aws ssm send-command \
        --instance-ids "$INSTANCE_ID" \
        --document-name "AWS-RunShellScript" \
        --parameters commands=["$command_to_run"] \
        --query "Command.CommandId" \
        --output text)

    # Wait for the command to execute
    wait_for_command "$command_id"

    results=$(aws ssm get-command-invocation \
        --command-id "$command_id" \
        --instance-id "$INSTANCE_ID" \
        --query 'StandardOutputContent' \
        --output text)

    # Output the results from running the input command
    echo "$results"
}
Get SSM command output
command_id=$(aws ssm send-command \
    --instance-ids "${INSTANCE_ID}" \
    --document-name "AWS-RunShellScript" \
    --comment "Get IP Address" \
    --parameters "commands=ifconfig")

aws ssm get-command-invocation\
  --command-id $command_id \
  --instance-id ${INSTANCE_ID} \
    | jq -r .StandardOutputContent \
    | awk -F ': ' '{print $2}'
Resource: https://cloudaffaire.com/how-to-execute-a-command-using-aws-ssm-run-command/
SSH over SSM
Add your ssh public key to your instance’s
authorized_keysfile.Add this to your local system’s
~/.ssh/config:# SSH over Session Manager host i-* mi-* ProxyCommand sh -c "aws ssm start-session --target %h --document-name AWS-StartSSHSession --parameters 'portNumber=%p'"Access the instance:
ssh -i ~/.ssh/instance-key.pem ubuntu@$INSTANCE_ID:
Resource: https://linuxhint.com/aws-session-manager-with-ssh-and-scp-capability/
Setting Up RDP Over SSM
Prerequisites:
- AWS CLI installed and configured with the necessary permissions for AWS Systems Manager (SSM).
- The target EC2 instance must have the SSM Agent installed and running.
- No need to modify security group rules—SSM handles the connection.
Instructions:
- Start an SSM Session with Port Forwarding
Before connecting via RDP, establish a port forwarding session to your EC2 instance:
export INSTANCE_ID=i-xxxxx  # Replace with your instance ID
export LOCAL_RDP_PORT=13390  # Set your preferred local port

aws ssm start-session --target $INSTANCE_ID --document-name AWS-StartPortForwardingSession --parameters "portNumber=3389,localPortNumber=$LOCAL_RDP_PORT"
This command forwards traffic from localhost:$LOCAL_RDP_PORT to the RDP service running on the instance (port 3389).
- Configure Your RDP File
Create or modify an .rdp file to use the forwarded connection. Save the following content as ssm-rdp.rdp:
smart sizing:i:1
screen mode id:i:2
use multimon:i:0
authentication level:i:2
desktopwidth:i:0
desktopheight:i:0
redirectsmartcards:i:1
redirectclipboard:i:1
full address:s:127.0.0.1:<LOCAL_RDP_PORT>
autoreconnection enabled:i:1
session bpp:i:32
audiomode:i:0
username:s:<RDP_USERNAME>
Replace:
<LOCAL_RDP_PORT>with the value from$LOCAL_RDP_PORT<RDP_USERNAME>with your username (e.g.,DOMAIN\userorAdministrator)
Alternatively, generate the .rdp file dynamically:
export RDP_USERNAME="DOMAIN\\user"  # Replace with your actual username

cat <<EOF > ssm-rdp.rdp
smart sizing:i:1
screen mode id:i:2
use multimon:i:0
authentication level:i:2
desktopwidth:i:0
desktopheight:i:0
redirectsmartcards:i:1
redirectclipboard:i:1
full address:s:127.0.0.1:$LOCAL_RDP_PORT
autoreconnection enabled:i:1
session bpp:i:32
audiomode:i:0
username:s:$RDP_USERNAME
EOF
Connect via RDP
On Windows:
- Double-click the
ssm-rdp.rdpfile. - If prompted, enter your RDP credentials.
- Click “OK” to start the session.
On macOS/Linux:
- If using Microsoft Remote Desktop, open the app and manually enter
127.0.0.1:$LOCAL_RDP_PORTas the remote address. - If using Remmina, create a new RDP connection and set the hostname to
127.0.0.1with the custom port.
- Double-click the
Ending the Session
When finished, terminate the SSM session by pressing Ctrl + C in the terminal running aws ssm start-session.
Wait for SSM agent to become available
    until aws ssm describe-instance-information \
      --instance-information-filter-list "key=InstanceIds,valueSet=${aws_instance.base_instance.id}" \
      | grep -q 'AgentVersion'; do
      sleep 15
    done
Resource: https://github.com/aws/aws-cli/issues/4006
Wait for command to finish
# Wait for Command
# Monitors the status of the previously run command until it completes. The command is considered complete when its status is "Success".
# If the command status is "Pending" or "InProgress", the function waits and checks again. If the command status is "Failed" or an unexpected status, the function exits with an error.
#
# Usage:
#   wait_for_command [command_id]
#
# Output:
#   If the command status is "Failed" or an unexpected status, an error message is printed to the standard output.
#   Otherwise, the function silently waits until the command has finished running, pausing script execution during this time.
#
# Example(s):
#   wait_for_command "0abcd1234efgh5678"
wait_for_command() {
    local command_to_run="$1"
    local command_status

    while true; do
        command_status=$(aws ssm list-command-invocations --command-id "$command_to_run" --details --query 'CommandInvocations[0].Status' --output text)

        if [ -z "$command_status" ]; then
            echo "Failed to fetch command status."
            exit 1
        elif [ "$command_status" == "Success" ]; then
            break
        elif [ "$command_status" == "Failed" ]; then
            echo "Command execution failed."
            exit 1
        elif [ "$command_status" == "Pending" ] || [ "$command_status" == "InProgress" ]; then
            echo "Command is still running, waiting for completion..."
            sleep 5
        else
            echo "Command is in unexpected status: $command_status"
            exit 1
        fi
    done
}
KMS
Create KMS key for session encryption
It’s worth noting that sessions already have encryption in place for SSM connection data (TLS 1.2 by default). However, if you want to use fleet manager, then you’ll need to enable KMS encryption.
- Navigate to https://your-region.console.aws.amazon.com/kms/home?region=your-region#/kms/keys/create
- Leave the default (Symmetric)
- Click Next
- Input an alias, provide a Name tag if you choose -> Next
- Specify the role you use for the SSM IAM Instance Profile - if you don’t have one yet, it’s the name of the role you create at step 4 of the guide below
- Click Next
- Click Finish
Resources:
Enable KMS Encryption
- Navigate to https://console.aws.amazon.com/systems-manager/session-manager/preferences?region=your-region
- Click Preferences -> Edit
- Check the box next to Enable KMS encryption
- Click Select a KMS key -> select the key we created previously from the dropdown
- Scroll all the way down and click Save
Access EC2 instance
Create the SSM Service Linked role:
aws iam create-service-linked-role \
  --aws-service-name ssm.amazonaws.com \
  --description "Provides access to AWS Resources managed or used by Amazon SSM"
Create an instance profile for SSM:
aws iam create-instance-profile \
  --instance-profile-name AmazonSSMInstanceProfileForInstances
Create a trust relation JSON file:
cat > trust_policy.json <<- EOM
{
  "Version":"2012-10-17",
  "Statement":[
   {
      "Effect":"Allow",
      "Principal":{
      "Service":"ec2.amazonaws.com"
    },
    "Action":"sts:AssumeRole"
    }
  ]
}
EOM
Create SSM IAM role:
aws iam create-role \
 --role-name "AmazonSSMRoleForInstances" \
 --assume-role-policy-document file://trust_policy.json
Attached required IAM policy for SSM:
aws iam attach-role-policy \
 --role-name "AmazonSSMRoleForInstances" \
 --policy-arn "arn:aws:iam::aws:policy/AmazonSSMManagedInstanceCore"
If you are using KMS encryption, you’ll need to add an inline policy as well:
cat > kms_ssm_policy.json <<- EOM
{
    "Version": "2012-10-17",
    "Statement": [
        {
            "Effect": "Allow",
            "Action": [
                "kms:GenerateDataKey"
            ],
            "Resource": "YOURKEYARN"
        }
    ]
}
EOM
Note: Be sure to replace
YOURKEYARNwith your KMS key’s ARN.Add the policy to your existing role:
aws iam put-role-policy \
  --role-name "AmazonSSMRoleForInstances" \
  --policy-name KMSSSM \
  --policy-document file://kms_ssm_policy.json
Attach the role to the instance profile:
aws iam add-role-to-instance-profile \
  --instance-profile-name "AmazonSSMInstanceProfileForInstances" \
  --role-name "AmazonSSMRoleForInstances"
Attach the instance profile to an EC2 instance:
aws ec2 associate-iam-instance-profile \
 --instance-id $INSTANCE_ID \
 --iam-instance-profile "Name=AmazonSSMInstanceProfileForInstances"
Access the instance with SSM:
INSTANCE_ID=i-xxxxx
aws ssm start-session --target "${INSTANCE_ID}"
Resources:
Policy to set up CKMS with cloudwatch
{
  "Id": "key-consolepolicy-3",
  "Version": "2012-10-17",
  "Statement": [
    {
      "Sid": "Enable IAM User Permissions",
      "Effect": "Allow",
      "Principal": {
        "AWS": "arn:aws:iam::YOURAWSACCOUNTIDGOESHERE:root"
      },
      "Action": "kms:*",
      "Resource": "*"
    },
    {
      "Sid": "Allow access for Key Administrators",
      "Effect": "Allow",
      "Principal": {
        "AWS": "arn:aws:iam::YOURAWSACCOUNTIDGOESHERE:user/YOURIAMUSERORROLEORWHATEVERNAMEGOESHERE"
      },
      "Action": [
        "kms:Create*",
        "kms:Describe*",
        "kms:Enable*",
        "kms:List*",
        "kms:Put*",
        "kms:Update*",
        "kms:Revoke*",
        "kms:Disable*",
        "kms:Get*",
        "kms:Delete*",
        "kms:TagResource",
        "kms:UntagResource",
        "kms:ScheduleKeyDeletion",
        "kms:CancelKeyDeletion"
      ],
      "Resource": "*"
    },
    {
      "Sid": "Allow use of the key",
      "Effect": "Allow",
      "Principal": {
        "AWS": "arn:aws:iam::YOURAWSACCOUNTIDGOESHERE:user/YOURIAMUSERORROLEORWHATEVERNAMEGOESHERE"
      },
      "Action": [
        "kms:Encrypt",
        "kms:Decrypt",
        "kms:ReEncrypt*",
        "kms:GenerateDataKey*",
        "kms:DescribeKey"
      ],
      "Resource": "*"
    },
    {
      "Sid": "Allow attachment of persistent resources",
      "Effect": "Allow",
      "Principal": {
        "AWS": "arn:aws:iam::YOURAWSACCOUNTIDGOESHERE:user/YOURIAMUSERORROLEORWHATEVERNAMEGOESHERE"
      },
      "Action": ["kms:CreateGrant", "kms:ListGrants", "kms:RevokeGrant"],
      "Resource": "*",
      "Condition": {
        "Bool": {
          "kms:GrantIsForAWSResource": "true"
        }
      }
    },
    {
      "Sid": "AllowCloudWatch",
      "Effect": "Allow",
      "Principal": {
        "Service": "logs.amazonaws.com"
      },
      "Action": [
        "kms:Encrypt",
        "kms:Decrypt",
        "kms:ReEncrypt*",
        "kms:GenerateDataKey*",
        "kms:DescribeKey"
      ],
      "Resource": "*"
    }
  ]
}
Parameter Store UI Location
- Login
- Search for Systems Manager
- Click on Parameter Store in the menu on the left-hand side
View information for all VPCs
- Open the VPC dashboard
- Click on Running instances -> See all regions
ECR
List repositories
aws ecr describe-repositories | jq
Create and Delete Repositories
create_ecr_repo() {
  REPO_NAME=name
  aws ecr create-repository \
    --repository-name "${REPO_NAME}" \
      | jq
}

delete_ecr_repo() {
  REPO_NAME=name
  aws ecr delete-repository \
    --repository-name "${REPO_NAME}" \
      | jq
}
Resources:
- https://docs.aws.amazon.com/cli/latest/reference/ecr/create-repository.html
- https://docs.aws.amazon.com/cli/latest/reference/ecr/delete-repository.html
Delete repository with images
REPO_NAME=name
aws ecr delete-repository \
  --repository-name "${REPO_NAME}" \
  --force \
    | jq
Resource: https://docs.aws.amazon.com/cli/latest/reference/ecr/delete-repository.html
Delete all repositories
Obviously this is incredibly destructive, so be extremely careful if you use this, it will delete ALL of the repos in your region!!!
repos=$(aws ecr describe-repositories \
  | jq -c .repositories)

# delete_repo deletes the repository
# specified with the $repo_name parameter
delete_repo() {
    aws ecr delete-repository --repository-name ${repo_name} --force | jq
}

for repo in $(echo "${repos}" \
  | jq -r '.[] | @base64'); do
    repo_name=$(echo "${repo}" | base64 -D | jq -r '.repositoryName')
    delete_repo "${repo_name}"
done
Resource: https://www.starkandwayne.com/blog/bash-for-loop-over-json-array-using-jq/
Build and push container image from Dockerfile
ECR_URL=11111111111.dkr.ecr.us-east-1.amazonaws.com
ECR_REPO=myecrrepo
IMAGE_NAME=myawesomecontainerimage
TAG=latest

# Authenticate to ECR
aws ecr get-login-password | docker login --username AWS --password-stdin "${ECR_URL}"

# Build docker image
docker build -t "${ECR_REPO}" .

# Tag container image
docker tag "${ECR_REPO}:${TAG}" "${ECR_URL}/${ECR_REPO}:${TAG}"

# Push image
docker push "${ECR_URL}/${ECR_REPO}:${TAG}"
Grab cert from ACM
grab_cert.sh:
#!/usr/bin/env bash

# exit if a command's exit code != 0
set -e

# Get the certificate ARN
aws_certs=$(aws acm list-certificates | jq .CertificateSummaryList)
cert_arn=''
cert_domain=''
for row in $(echo "${aws_certs}" | jq -r '.[] | @base64'); do
    # Get the cert domain
    cert_domain=$(echo ${row} | base64 --decode | jq -r '.DomainName')
    cert_arn=$(echo ${row} | base64 --decode | jq -r .'CertificateArn')
    if [[ "${cert_domain}" == "${row}" ]]; then
        echo "Got the ARN associated with ${cert_domain} - ${cert_arn}"
        break
    fi
done

aws acm get-certificate \
  --certificate-arn "${cert_arn}" \
    | jq -r .Certificate > "${cert_domain}.pem"
aws acm get-certificate \
  --certificate-arn "${cert_arn}" \
    | jq -r .CertificateChain > "${cert_domain}-fullchain.pem"
Resources:
Create LetsEncrypt Cert using Route 53 plugin
This has been tested solely on Ubuntu 20.04:
check_root() {
  if [[ "${EUID}" -ne 0 ]]; then
    echo "Please run as root"
  exit 1
fi
}

get_cert() {
  check_root()
  snap install core; snap refresh core
  apt-get remove -y certbot
  snap install --classic certbot
  ln -s /snap/bin/certbot /usr/bin/certbot
  snap set certbot trust-plugin-with-root=ok
  snap install certbot-dns-route53
  if [[ ${CERT_MODE} == 'prod' ]]; then
      # Prod certs have a rate limit, so you want to be judicious
      # with the number of times you deploy with a prod cert
      certbot certonly --dns-route53 -d "${SERVER_DOMAIN}"
  else
      # Deploy with staging cert if prod isn't specified
      certbot certonly --dns-route53 --staging -d "${SERVER_DOMAIN}"
  fi
}

get_cert
Resource: https://certbot-dns-route53.readthedocs.io/en/stable/ - official docs
ECS
Delete all task definitions
get_task_definition_arns() {
    aws ecs list-task-definitions \
      --region "${AWS_DEFAULT_REGION}" \
        | jq -M -r '.taskDefinitionArns | .[]'
}

delete_task_definition() {
    local arn=$1

    aws ecs deregister-task-definition \
      --region "${AWS_DEFAULT_REGION}" \
      --task-definition "${arn}" > /dev/null
}

for arn in "$(get_task_definition_arns)"; do
    echo "Deregistering ${arn}..."
    delete_task_definition "${arn}"
    # Speed things up with concurrency:
    #delete_task_definition "${arn}" &
done
Resource: https://stackoverflow.com/questions/35045264/how-do-you-delete-an-aws-ecs-task-definition
EC2 Image Builder
Delete image builder artifacts
This will remove all of the components of an image builder deployment:
REGION=us-west-2
NAME=my-deployment
ACCT_ID="$(aws sts get-caller-identity | jq -r '.Account')"

aws imagebuilder delete-image-pipeline --image-pipeline-arn arn:aws:imagebuilder:$REGION:$ACCT_ID:image-pipeline/$NAME | jq
aws imagebuilder delete-image-recipe --image-recipe-arn arn:aws:imagebuilder:$REGION:$ACCT_ID:image-recipe/$NAME-recipe/1.0.0 | jq
aws imagebuilder delete-infrastructure-configuration --infrastructure-configuration-arn arn:aws:imagebuilder:$REGION:$ACCT_ID:infrastructure-configuration/$NAME-image-builder-infra-config | jq
aws imagebuilder delete-distribution-configuration --distribution-configuration-arn arn:aws:imagebuilder:$REGION:$ACCT_ID:distribution-configuration/$NAME-distribution | jq
aws imagebuilder delete-image --image-build-version-arn arn:aws:imagebuilder:$REGION:$ACCT_ID:image/$NAME-recipe/1.0.0/1 | jq
aws imagebuilder delete-component --component-build-version-arn arn:aws:imagebuilder:$REGION:$ACCT_ID:component/$NAME/1.0.0/1 | jq
Logs for failed image build
- Navigate to the Image Pipelines section of the EC2 Image Builder UI
- Click the pipeline associated with the problematic recipe
- Under Output images, click the Log stream associated with the failed image
Troubleshooting Components
If you have an issue with the provisioning logic in your component:
- Navigate to the Components section of the EC2 Image Builder UI
- Click on the problematic component
- Click Create new version, modify your provisioning logic, and click Create component
VPC
List VPCs
aws ec2 describe-vpcs
Resource: https://docs.aws.amazon.com/cli/latest/reference/ec2/describe-vpcs.html
Delete VPC
aws ec2 delete-vpc --vpc-id $vpc-xxxxx
Find Default VPC
# Find Default VPC
# Finds the default VPC ID.
#
# Usage:
#   find_default_vpc
#
# Output:
#   Outputs the default VPC ID.
#
# Example(s):
#   find_default_vpc
function find_default_vpc()
                            {
    aws ec2 describe-vpcs \
        --filters "Name=isDefault,Values=true" \
        --output text --query 'Vpcs[0].VpcId'
}
Delete VPC endpoints associated with a VPC
VPC_ID="vpc-xxxxxxxx"  # replace with your VPC ID

aws ec2 describe-vpc-endpoints --filters Name=vpc-id,Values=$VPC_ID --query 'VpcEndpoints[*].[VpcEndpointId]' --output text \
  | awk '{print $1}' | while read line; do
    sleep 2; aws ec2 delete-vpc-endpoints --vpc-endpoint-ids $line > /dev/null
done
The sleep was added to avoid this error:
An error occurred (RequestLimitExceeded) when calling the DeleteVpcEndpoints operation (reached max retries: 2): Request limit exceeded.
EKS
Confirm EKS identity provider configured
CLUSTER_NAME=mycluster
aws eks describe-cluster --name $CLUSTER_NAME --query "cluster.identity.oidc.issuer" --output text
Resource: https://www.padok.fr/en/blog/external-dns-route53-eks
Create kube config for EKS cluster
CLUSTER_NAME=mycluster
PROFILE_NAME=myprofile

aws eks update-kubeconfig --name $CLUSTER_NAME --region $AWS_DEFAULT_REGION --profile $PROFILE_NAME
OIDC
To set up OIDC, you first need a provider
Set up OpenIDConnect provider
THUMBPRINT=$(openssl x509 -in certificate.pem -fingerprint -noout -sha1 | cut -d'=' -f2 | tr -d ':')
aws iam create-open-id-connect-provider --url https://token.actions.githubusercontent.com --thumbprint-list $THUMBPRINT --client-id-list sts.amazonaws.com
Configure AWS resources
# Obtain server's certificate
echo | openssl s_client -servername token.actions.githubusercontent.com -showcerts -connect token.actions.githubusercontent.com:443 2>/dev/null | openssl x509 -outform PEM > certificate.pem

# Generate SHA-1 thumbprint
THUMBPRINT=$(openssl x509 -in certificate.pem -fingerprint -noout -sha1 | cut -d'=' -f2 | tr -d ':')

# Create OpenID Connect provider
aws iam create-open-id-connect-provider --url https://token.actions.githubusercontent.com --thumbprint-list $THUMBPRINT --client-id-list sts.amazonaws.com

# Create IAM role with trust policy (replace placeholders with actual values)
aws iam create-role --role-name YourRoleName --assume-role-policy-document file://trust-policy.json # see below for the contents of this file

# Attach policy to role (replace placeholders with actual values)
aws iam attach-role-policy --role-name YourRoleName --policy-arn YourPolicyARN
The contents of trust-policy.json:
{
  "Version": "2012-10-17",
  "Statement": [
    {
      "Sid": "",
      "Effect": "Allow",
      "Principal": {
        "Federated": "arn:aws:iam::YourAWSAccountID:oidc-provider/token.actions.githubusercontent.com"
      },
      "Action": "sts:AssumeRoleWithWebIdentity",
      "Condition": {
        "StringEquals": {
          "token.actions.githubusercontent.com:aud": "sts.amazonaws.com"
        },
        "StringLike": {
          "token.actions.githubusercontent.com:sub": [
            "repo:YourGitHubUsername/YourRepo:pull_request",
            "repo:YourGitHubUsername/YourRepo:ref:refs/heads/main"
          ]
        }
      }
    }
  ]
}
The Permissions for the IAM user will need to cover whatever you plan to do with the role.